I wanted to create the shared disks using vmware, but I have found article about how to create your own NAS so I will share the procedure with you.
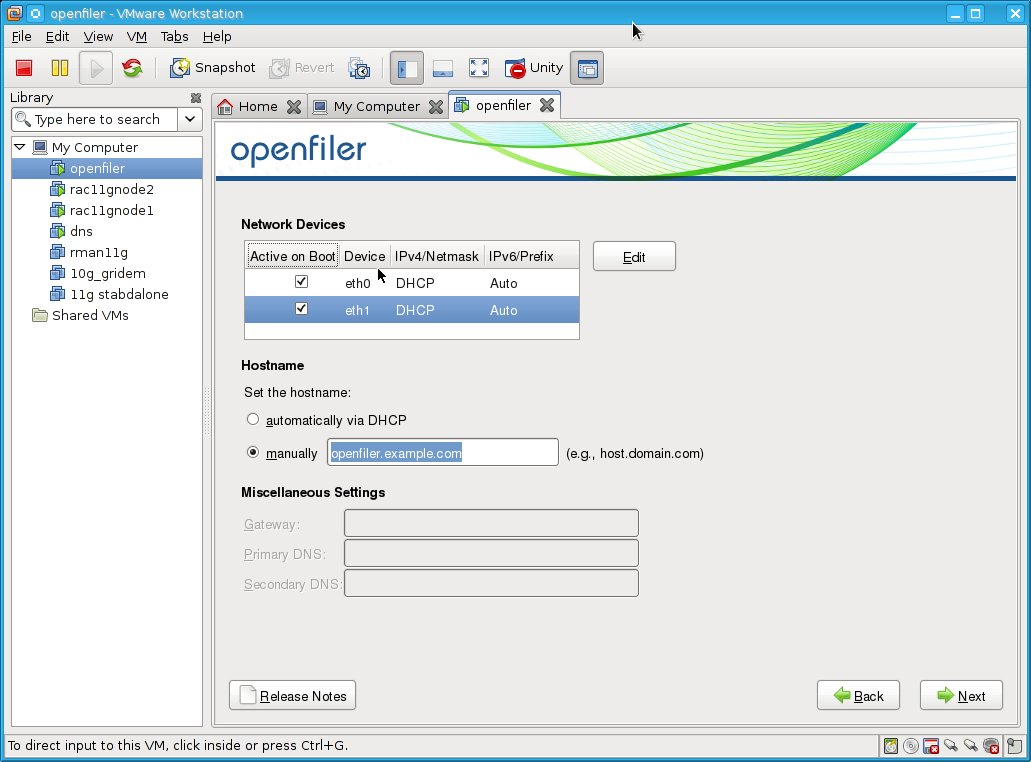
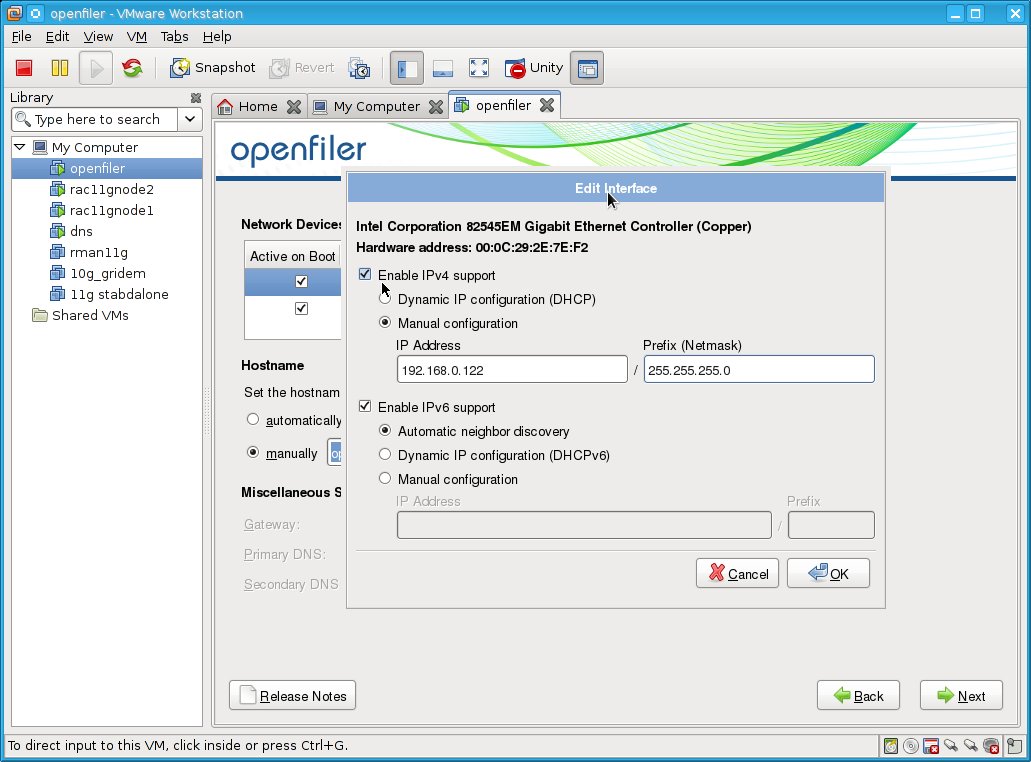
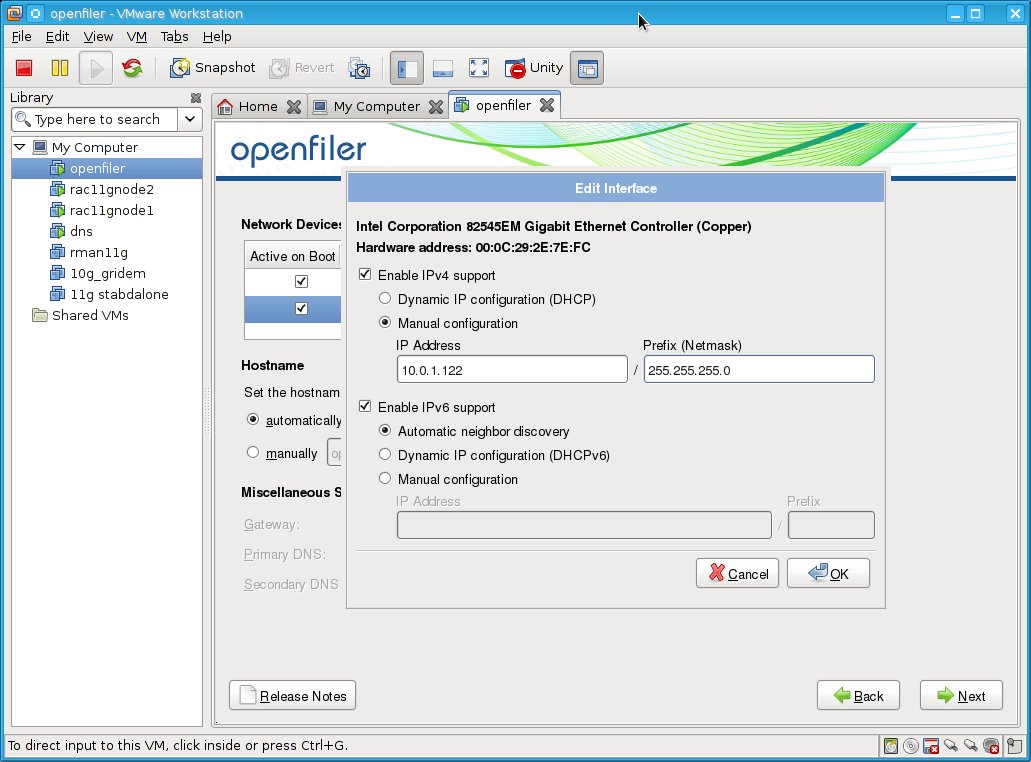
We will use the openfiler to create the SAN. First, we need to create new virtual server with 512MB of RAM and 15GB harddrive and two network interfaces.
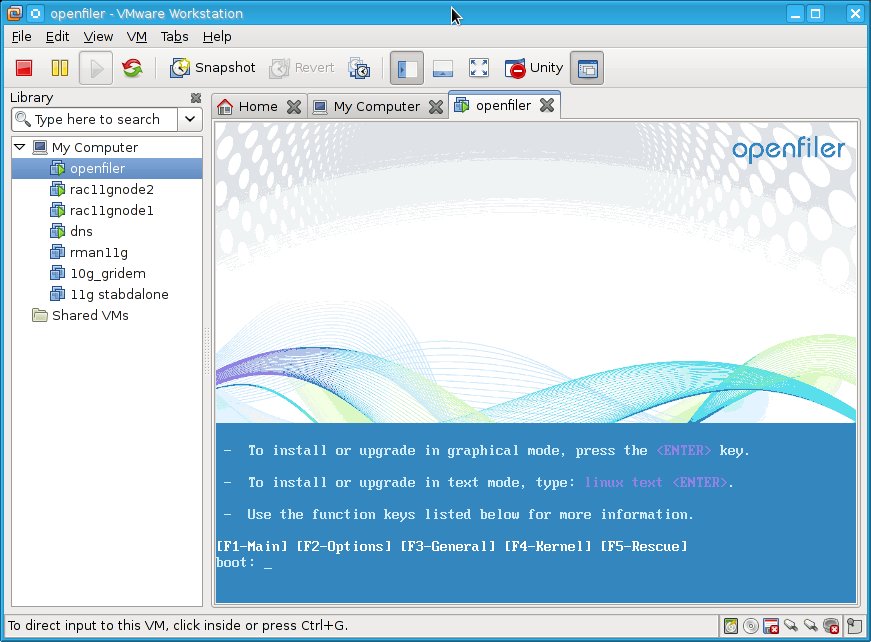
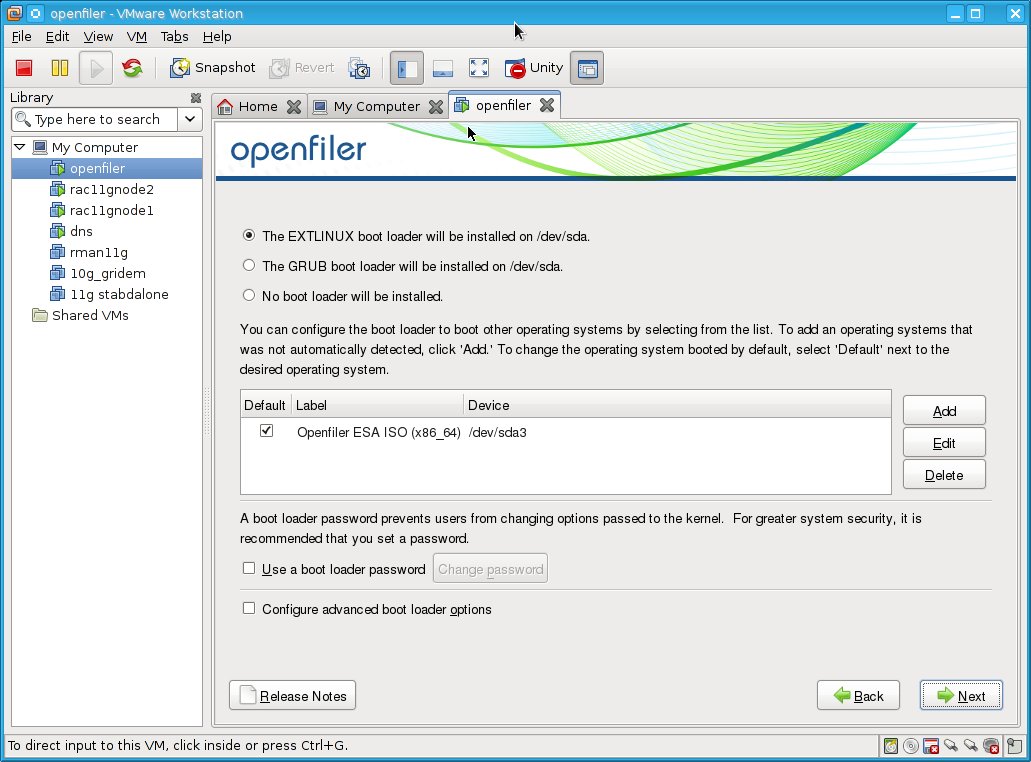
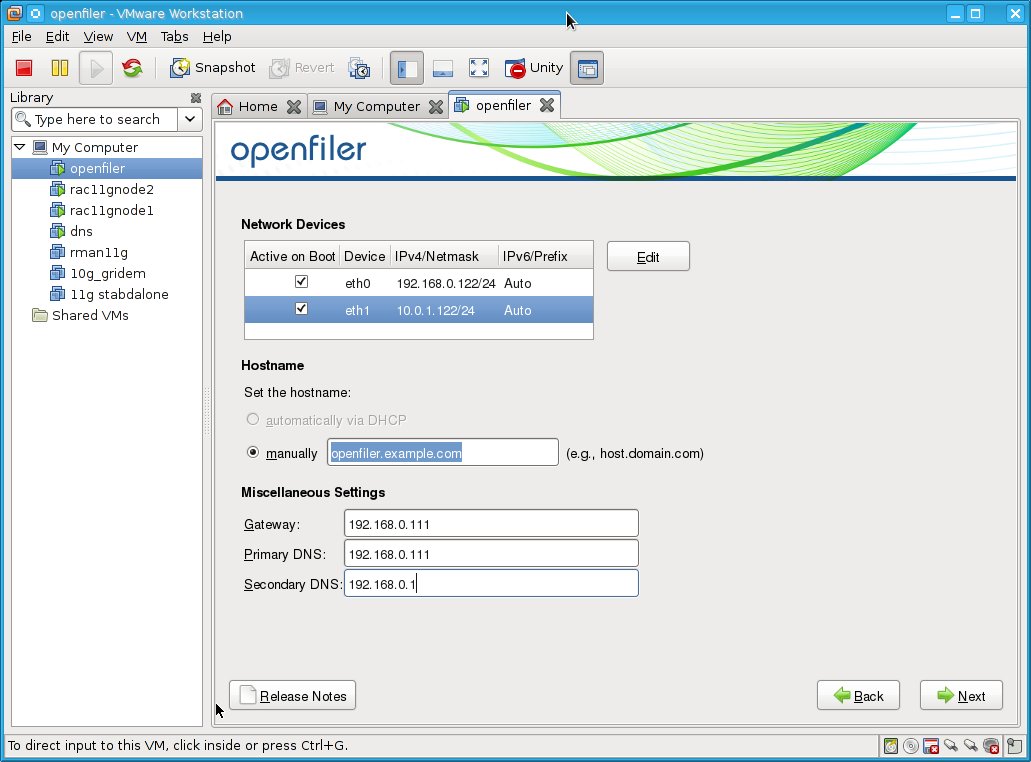
Now, we can install the openfiler:
Now, we can install the openfiler:
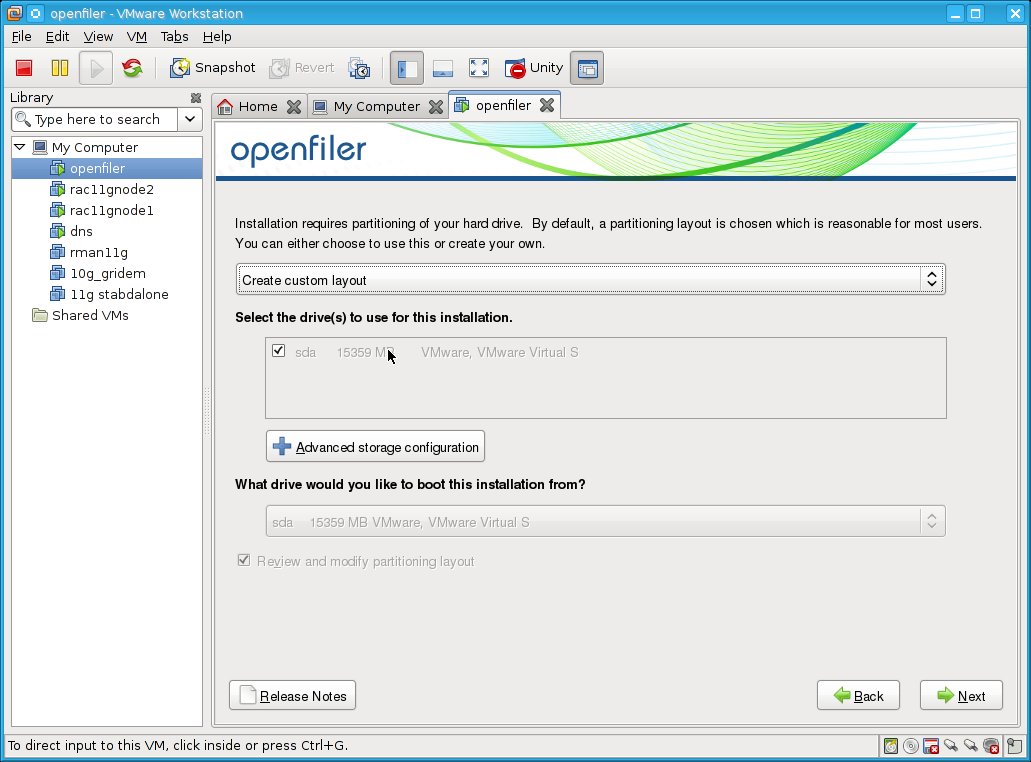
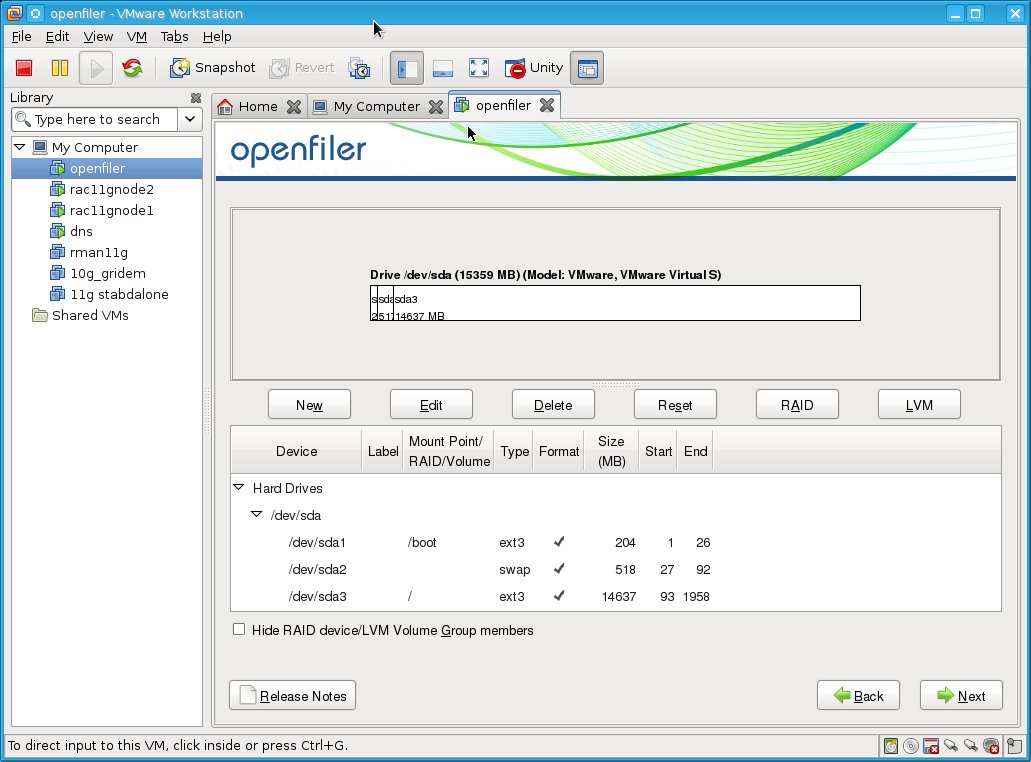
I will create custom layout:
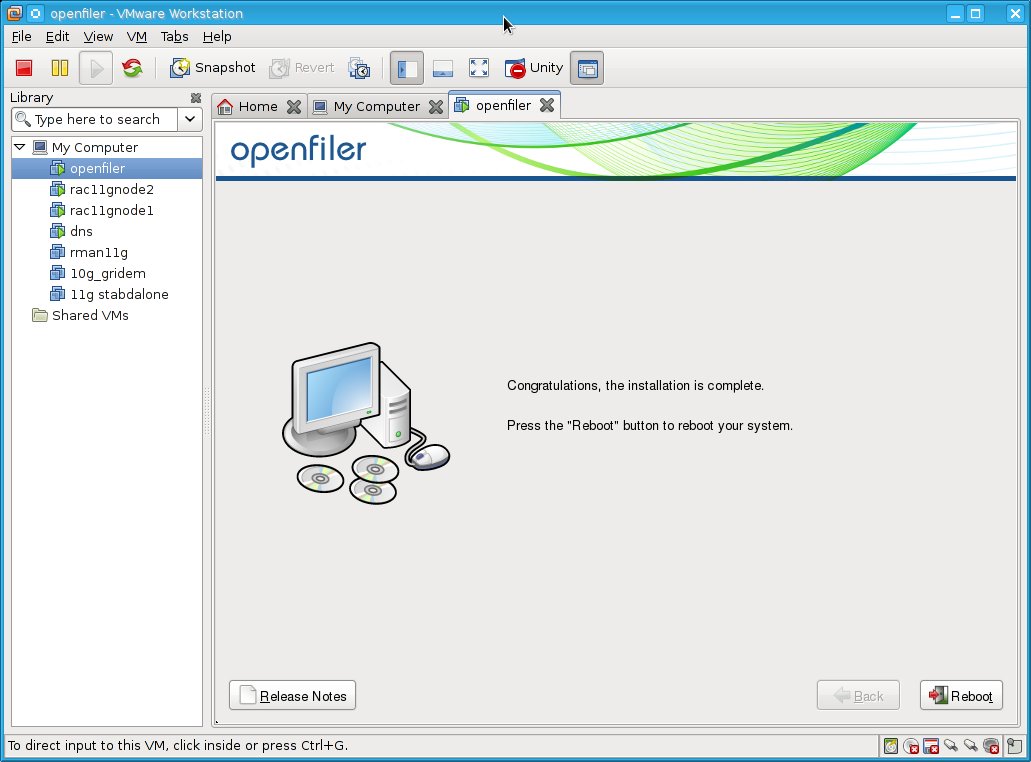
After the reboot, the server is ready for use.
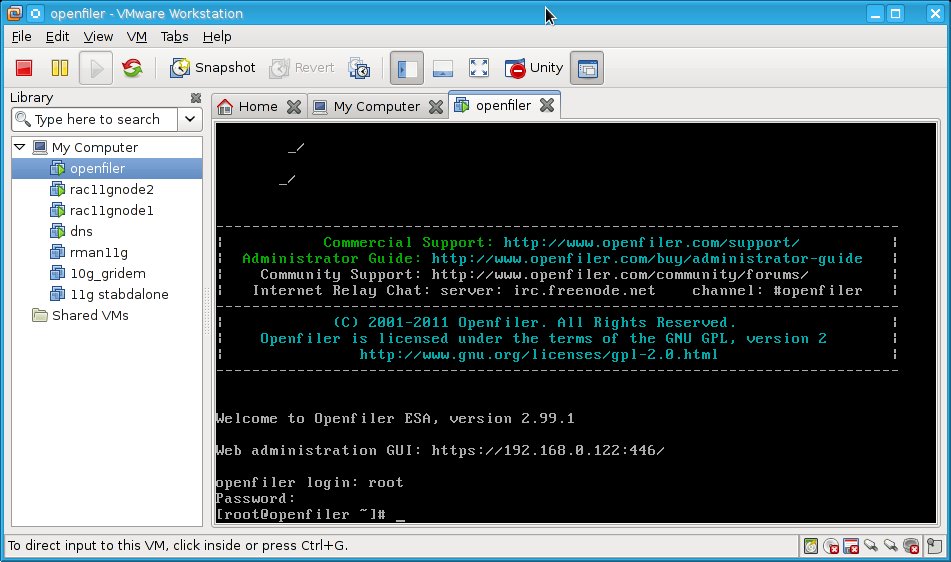
Now update the system using conary updateall command.
After reboot shut down the server, so we can add shared disks on your vmware server
[nisco@localhost shared_disks]$ vmware-vdiskmanager -c -s 1Gb -a lsilogic -t 4 /vmware/shared_disks/acfs1.vmdk
Creating disk '/vmware/shared_disks/acfs1.vmdk'
Create: 100% done.
Virtual disk creation successful.
[nisco@localhost shared_disks]$ vmware-vdiskmanager -c -s 1Gb -a lsilogic -t 4 /vmware/shared_disks/acfs2.vmdk
Creating disk '/vmware/shared_disks/acfs2.vmdk'
Create: 100% done.
Virtual disk creation successful.
[nisco@localhost shared_disks]$ vmware-vdiskmanager -c -s 5Gb -a lsilogic -t 4 /vmware/shared_disks/asm1.vmdk
Creating disk '/vmware/shared_disks/asm1.vmdk'
Create: 100% done.
Virtual disk creation successful.
[nisco@localhost shared_disks]$ vmware-vdiskmanager -c -s 5Gb -a lsilogic -t 4 /vmware/shared_disks/asm2.vmdk
Creating disk '/vmware/shared_disks/asm2.vmdk'
Create: 100% done.
Virtual disk creation successful.
[nisco@localhost shared_disks]$ vmware-vdiskmanager -c -s 5Gb -a lsilogic -t 4 /vmware/shared_disks/asm3.vmdk
Creating disk '/vmware/shared_disks/asm3.vmdk'
Create: 100% done.
Virtual disk creation successful.
[nisco@localhost shared_disks]$ vmware-vdiskmanager -c -s 5Gb -a lsilogic -t 4 /vmware/shared_disks/asm4.vmdk
Creating disk '/vmware/shared_disks/asm4.vmdk'
Create: 100% done.
Virtual disk creation successful.
[nisco@localhost shared_disks]$ vmware-vdiskmanager -c -s 5Gb -a lsilogic -t 4 /vmware/shared_disks/asm5.vmdk
Creating disk '/vmware/shared_disks/asm5.vmdk'
Create: 100% done.
Virtual disk creation successful.
[nisco@localhost shared_disks]$ vmware-vdiskmanager -c -s 5Gb -a lsilogic -t 4 /vmware/shared_disks/asm6.vmdk
Creating disk '/vmware/shared_disks/asm6.vmdk'
Create: 100% done.
Virtual disk creation successful.
[nisco@localhost shared_disks]$ vmware-vdiskmanager -c -s 10Gb -a lsilogic -t 4 /vmware/shared_disks/asm7.vmdk
Creating disk '/vmware/shared_disks/asm7.vmdk'
Create: 100% done.
Virtual disk creation successful.
[nisco@localhost shared_disks]$ vmware-vdiskmanager -c -s 10Gb -a lsilogic -t 4 /vmware/shared_disks/asm8.vmdk
Creating disk '/vmware/shared_disks/asm8.vmdk'
Create: 100% done.
Virtual disk creation successful.
[nisco@localhost shared_disks]$ ls
acfs1-flat.vmdk acfs2.vmdk asm2-flat.vmdk asm3.vmdk asm5-flat.vmdk asm6.vmdk asm8-flat.vmdk
acfs1.vmdk asm1-flat.vmdk asm2.vmdk asm4-flat.vmdk asm5.vmdk asm7-flat.vmdk asm8.vmdk
acfs2-flat.vmdk asm1.vmdk asm3-flat.vmdk asm4.vmdk asm6-flat.vmdk asm7.vmdk
Now wee need to add those disks to openfiler server:
Right click on openfiler vm --> settings
Choose Add --> Hard Disk ---> existing virtual disk --> specify the disk (acfs1.vmdk), choose independent --> Click on keep existing format when asked.
Repeat those steps for all hard disks you have created.
Shutdown the openfiler VM server and add folowing lines to the openfiler.vmx file to avoid disk locking:
disk.locking = "FALSE"
diskLib.dataCacheMaxSize = "0"
diskLib.dataCacheMaxReadAheadSize = "0"
diskLib.dataCacheMinReadAheadSize = "0"
diskLib.dataCachePageSize = "4096"
diskLib.maxUnsyncedWrites = "0"
Configure the iscsi on the openfiler server:
[root@openfiler ~]# more /etc/ietd.conf
#default ietd.conf
[root@openfiler ~]# cat /etc/initiators.allow
#default initiators.allow
[root@openfiler ~]# cat /etc/initiators.deny
#default initiators.deny
[root@openfiler ~]# service iscsi-target status
iSCSI target stopped
[root@openfiler ~]# service iscsi-target start
Starting iSCSI target service: [ OK ]
[root@openfiler ~]#
[root@openfiler ~]# chkconfig iscsi-target on
Now install the iscsi-initiator-utils on both RAC nodes:
[root@rac11gnode1 ~]# yum install iscsi-initiator-utils
[root@rac11gnode1 iscsi]# chkconfig --list|grep iscsi
iscsi 0:off 1:off 2:off 3:on 4:on 5:on 6:off
iscsid 0:off 1:off 2:off 3:on 4:on 5:on 6:off
[root@rac11gnode1 iscsi]# service iscsi status
iscsi is stopped
ping the server if it is reachable:
[root@rac11gnode1 iscsi]# ping 10.0.1.122
PING 10.0.1.122 (10.0.1.122) 56(84) bytes of data.
64 bytes from 10.0.1.122: icmp_seq=1 ttl=64 time=0.375 ms
Configure the iscsi storage with openfiler:
logon to https://ip_address_of_your_openfiler_server:446/ as openfile user with password "password"
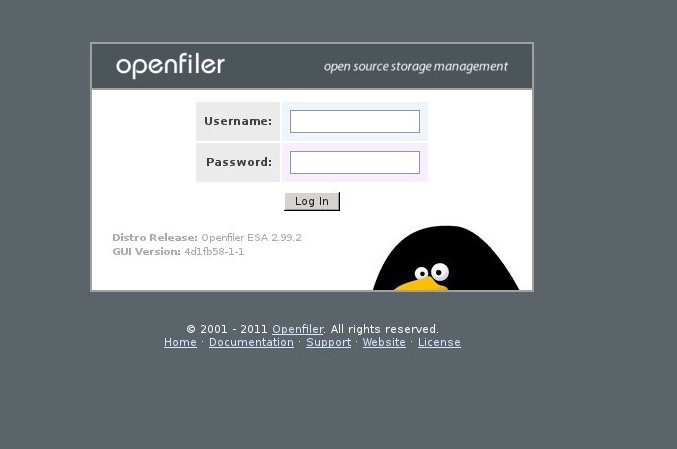
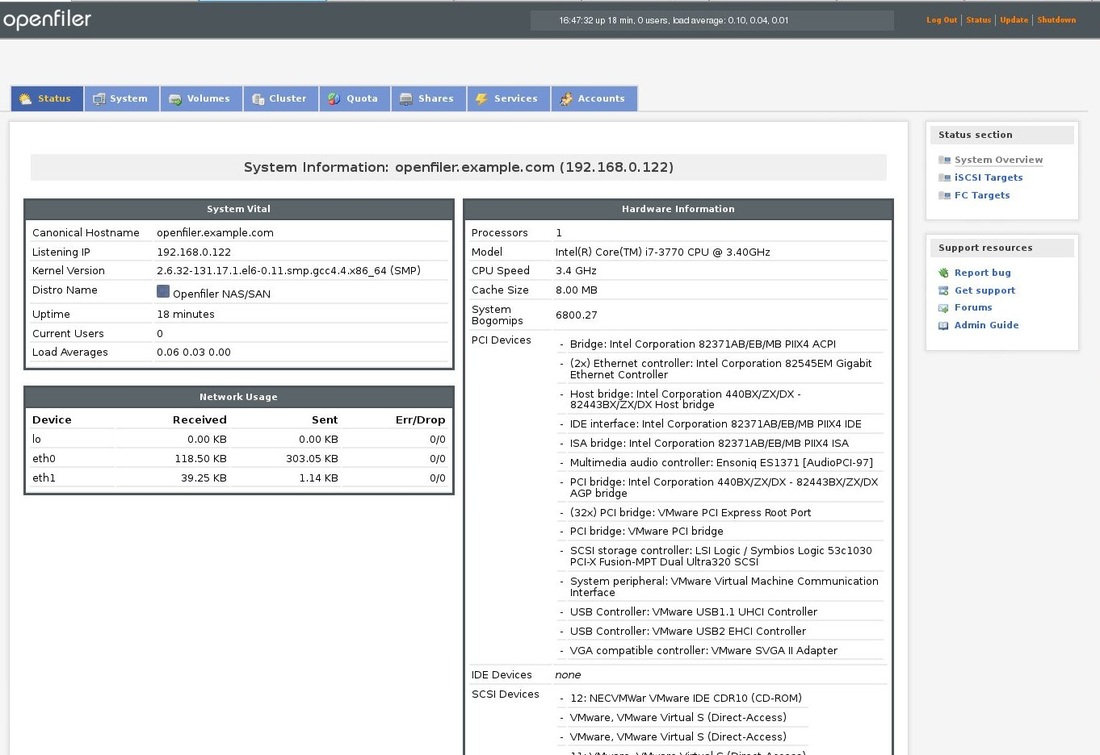
This should be the main page:
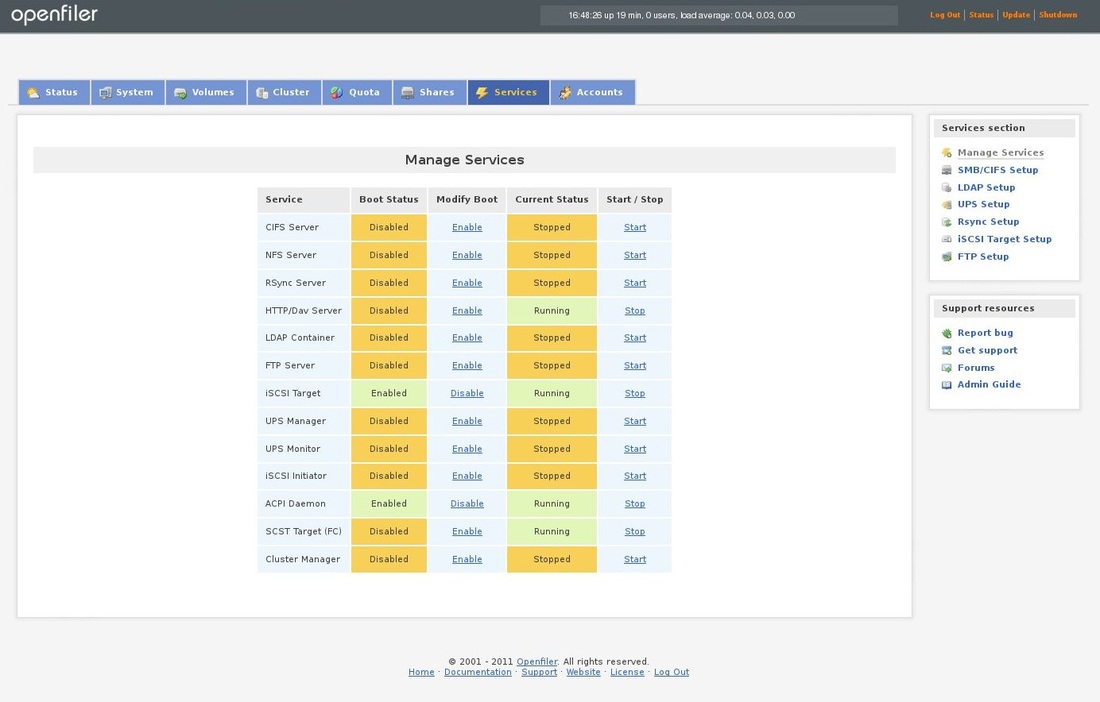
Click on the Services tab and enable the iSCSI Target:
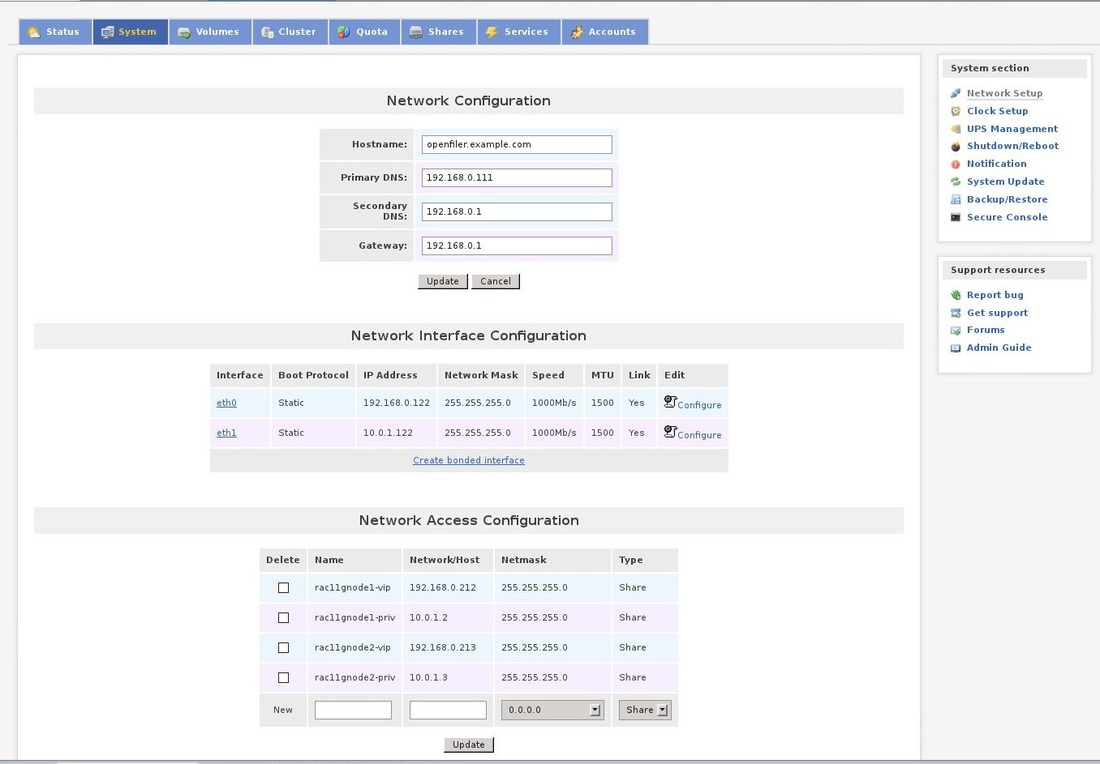
Now click on the System tab. scroll down and add the hostnames, i.p.addresses and netmask of all servers that will use the storage:
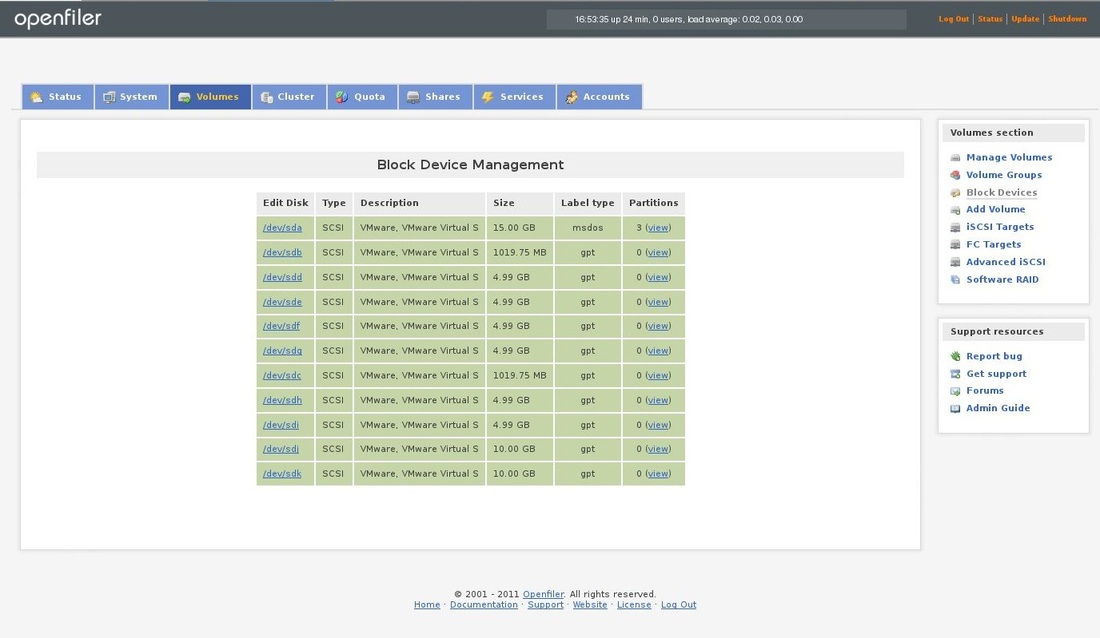
Now click on the Volumes tab and choose Block devices in the menu on the right side. You should see all the disks you have created before:
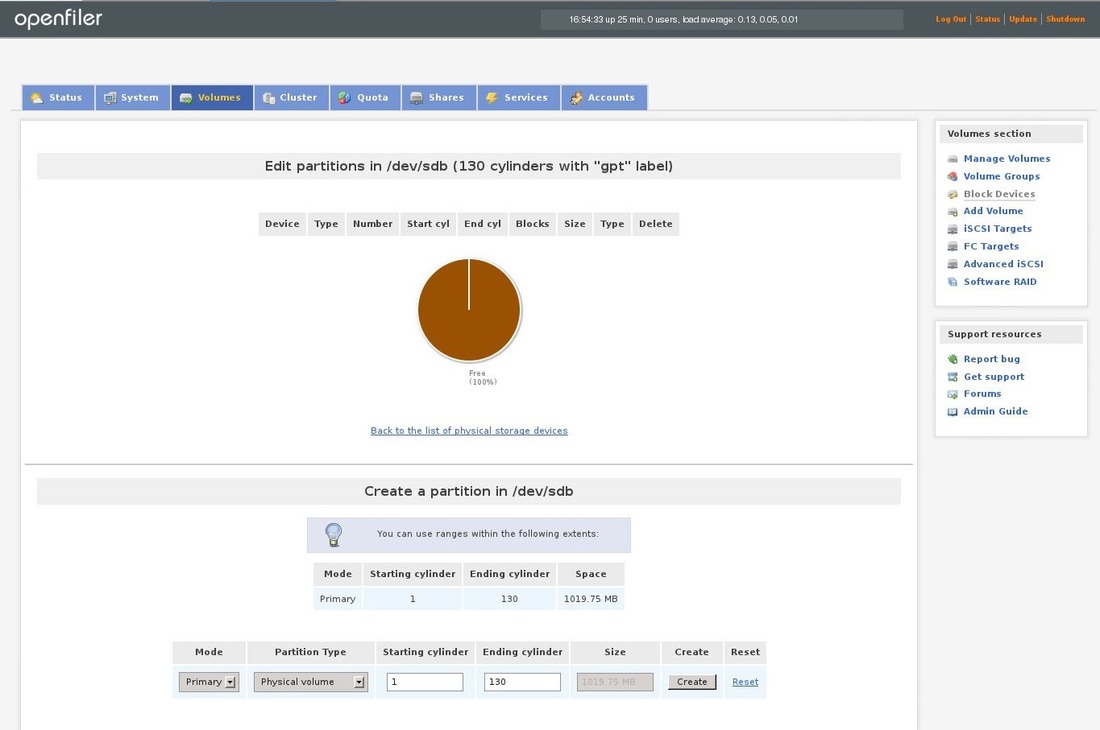
Choose the first block device with no partition created and you will see following screen. Now click on the Create on the bottom of the page and you will create new partition.
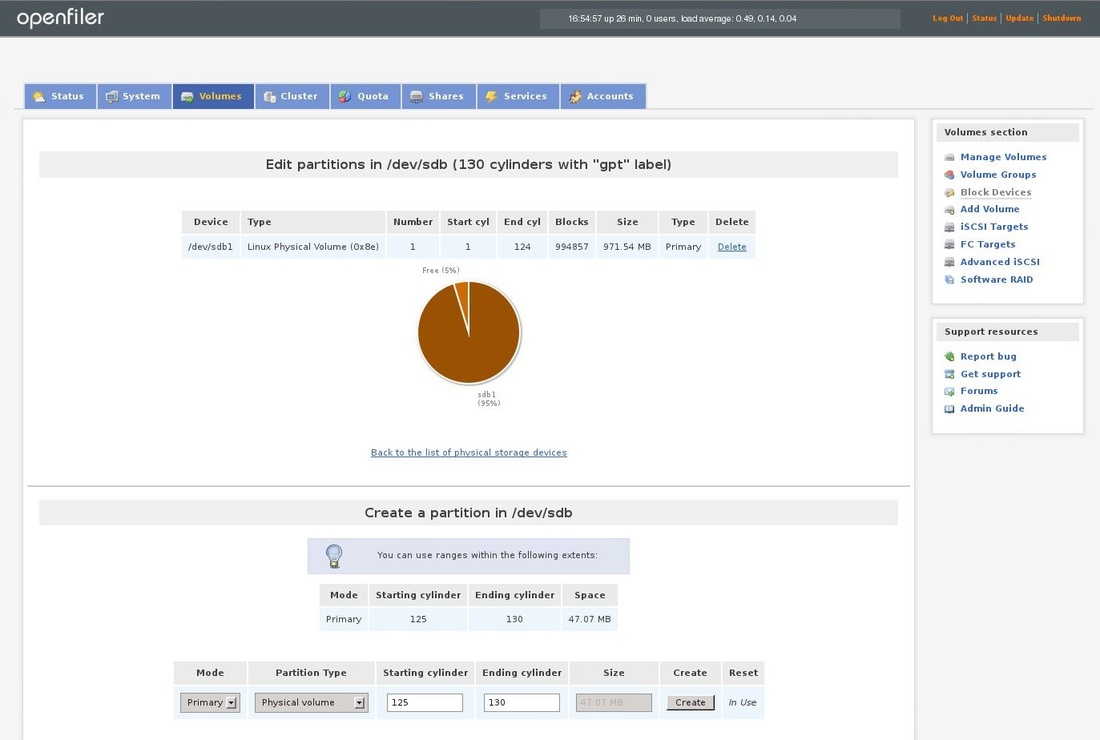
You can see, that new partition was created:
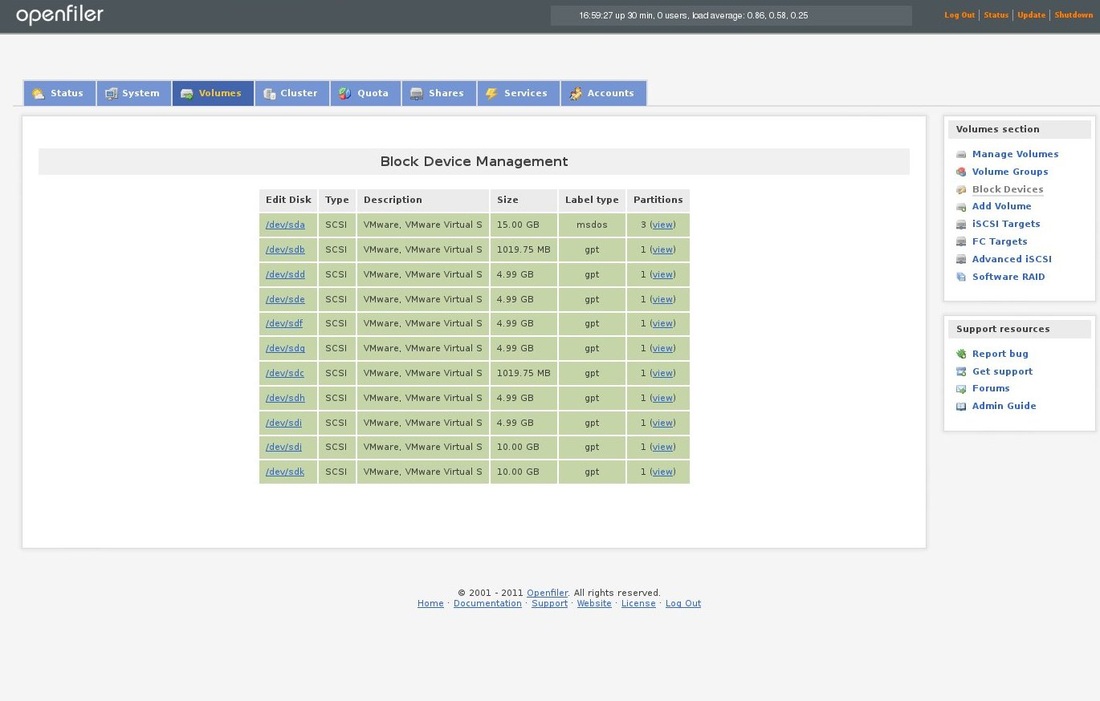
Repeat the above process with all block devices. On next picture you can see, that each block device has at least 1 partition. The first block device with 3 partitions is the disk where operating system is installed on the openfiler.
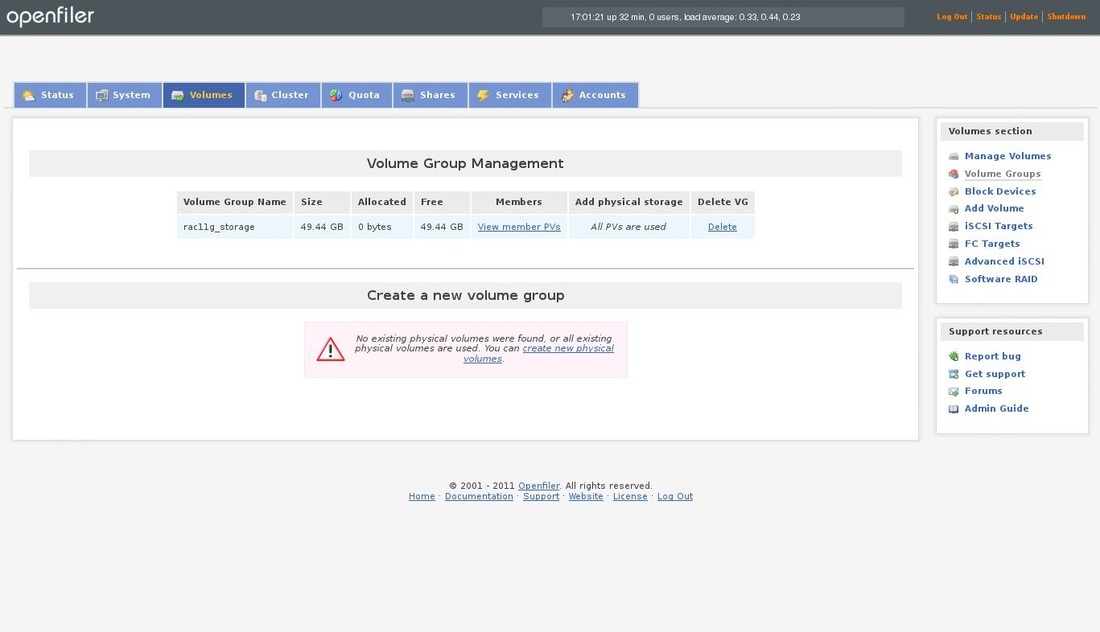
Now click on the Volumes tab and choose Volume Groups from the menu on the right side. Fill in the volume group name and choose all disks you want to add to that group and click the Add volume group button.
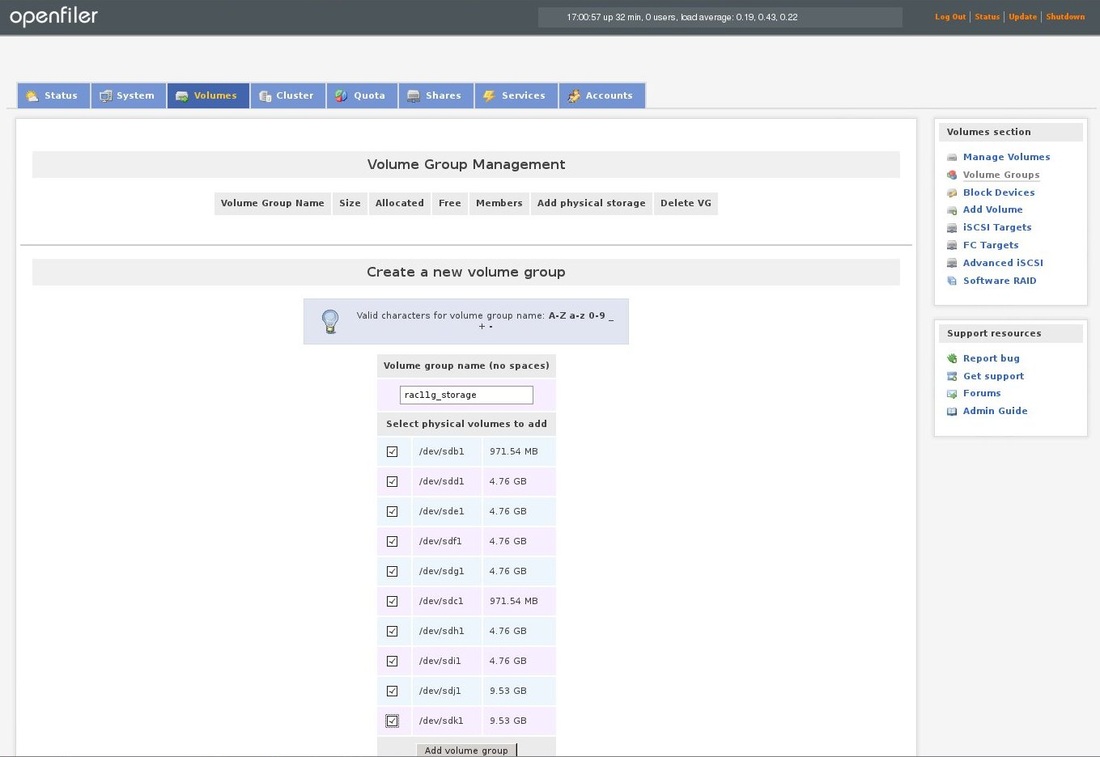
Here you can see, that the volume group was created:
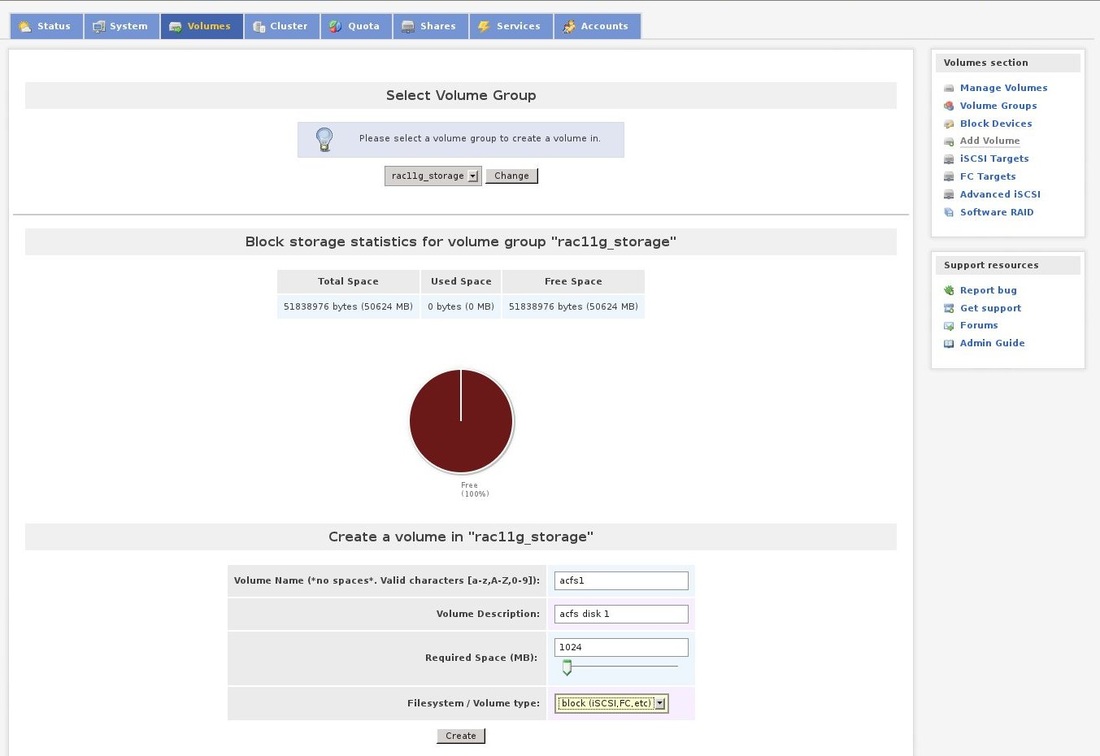
Now we will create the new disks for the ASM. Choose the Volumes tab a click on Add volume in the menu on the right.
Choose the volume name, fill some short description, choose size of the disk and choose block iSCSI as the filesystem/Volume type:
Choose the volume name, fill some short description, choose size of the disk and choose block iSCSI as the filesystem/Volume type:
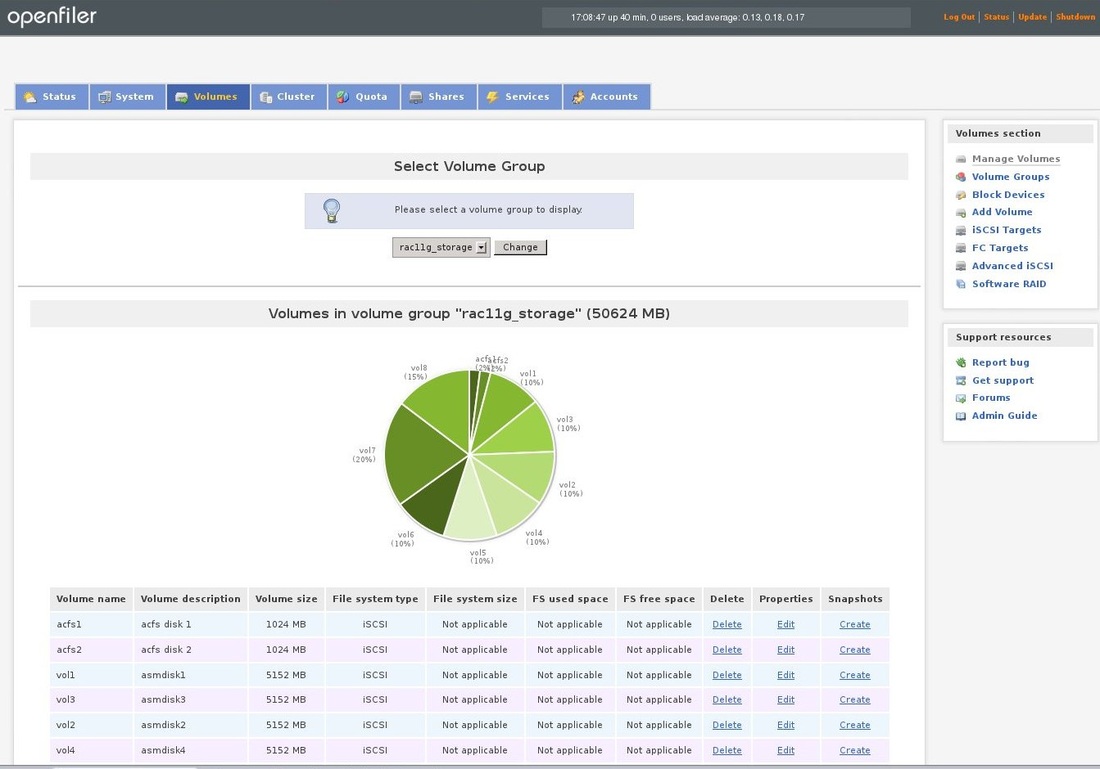
You should repeat the above procedure until all space will be allocated:
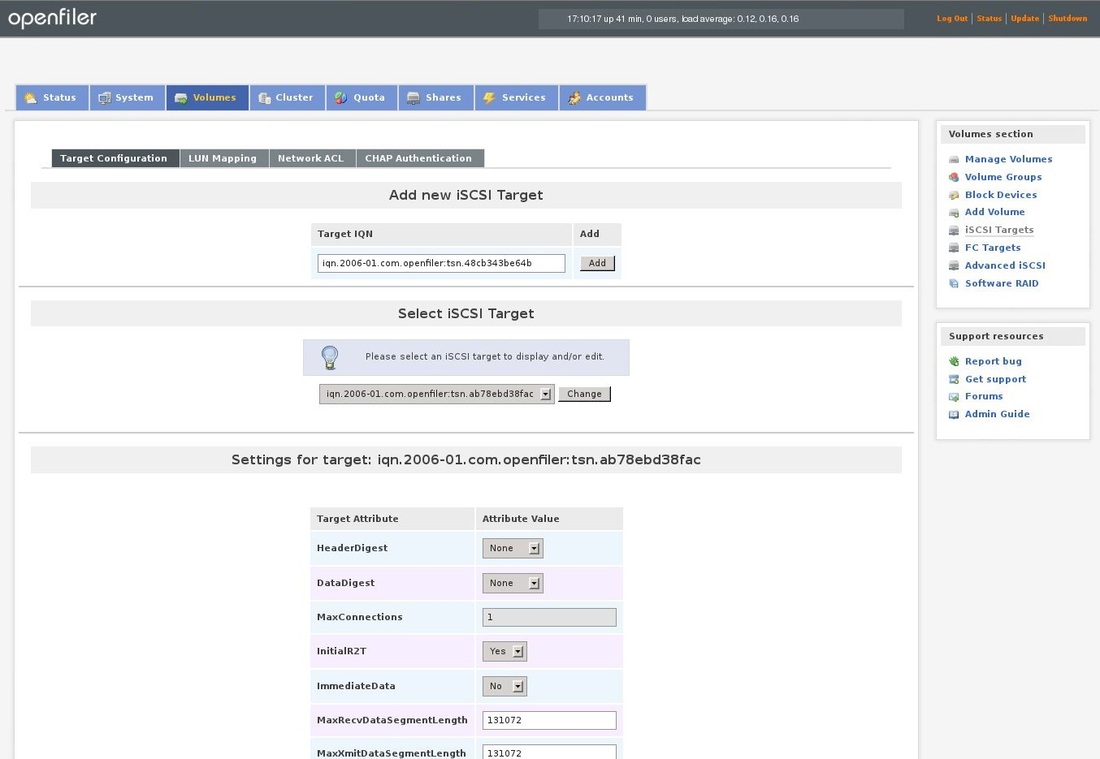
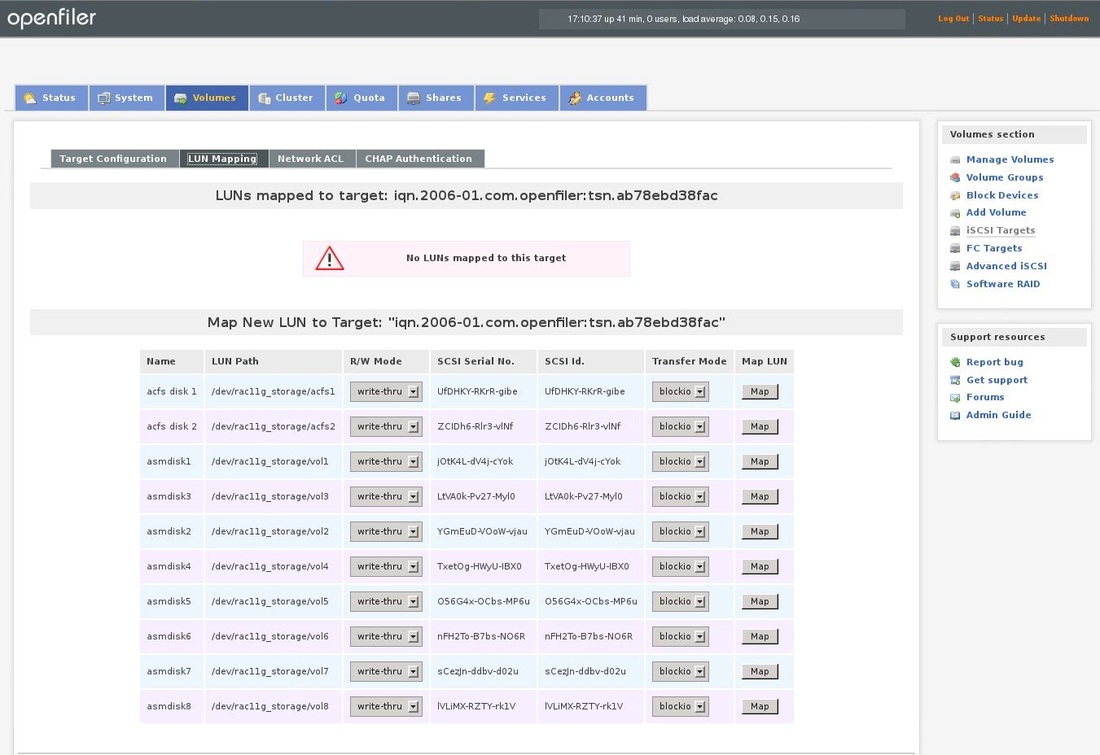
Now click on the Volumes tab and choose iSCSI Targets from the menu. Click on the Add button. If the options on this page are greyed and you cant choose anything. Check if iscsi services are running on the openfiler server.

After you have clicked the add button, you should see following screen. I haven't change anything on this page.
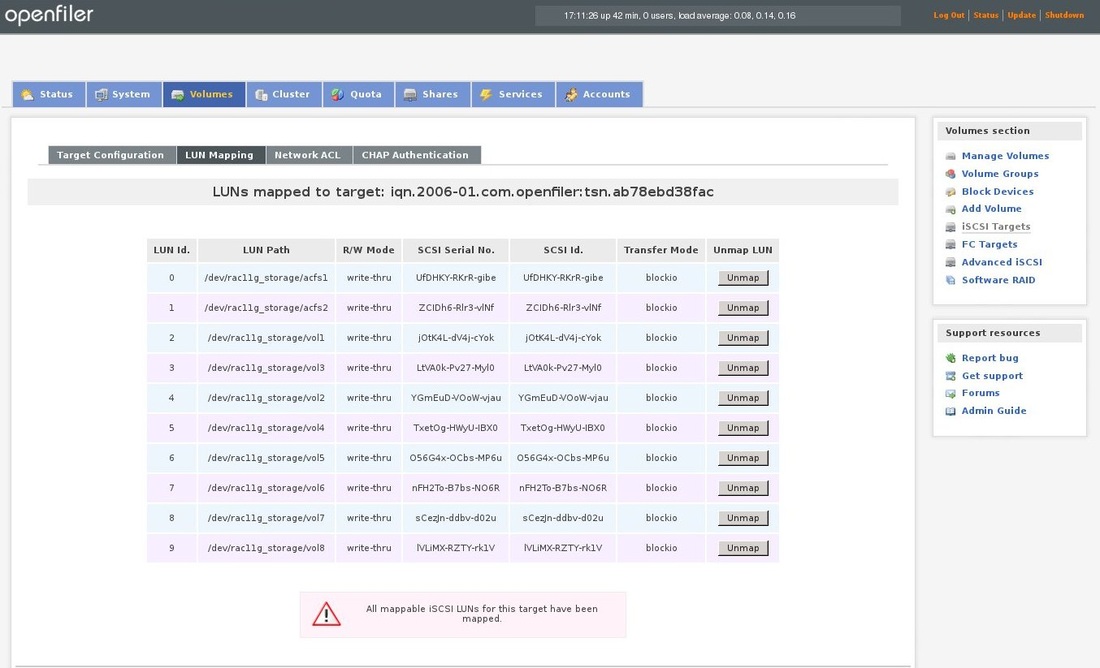
Click on the LUN Mapping on the same page and click on Map button on all disks you want to map:
Now all disks should be mapped:
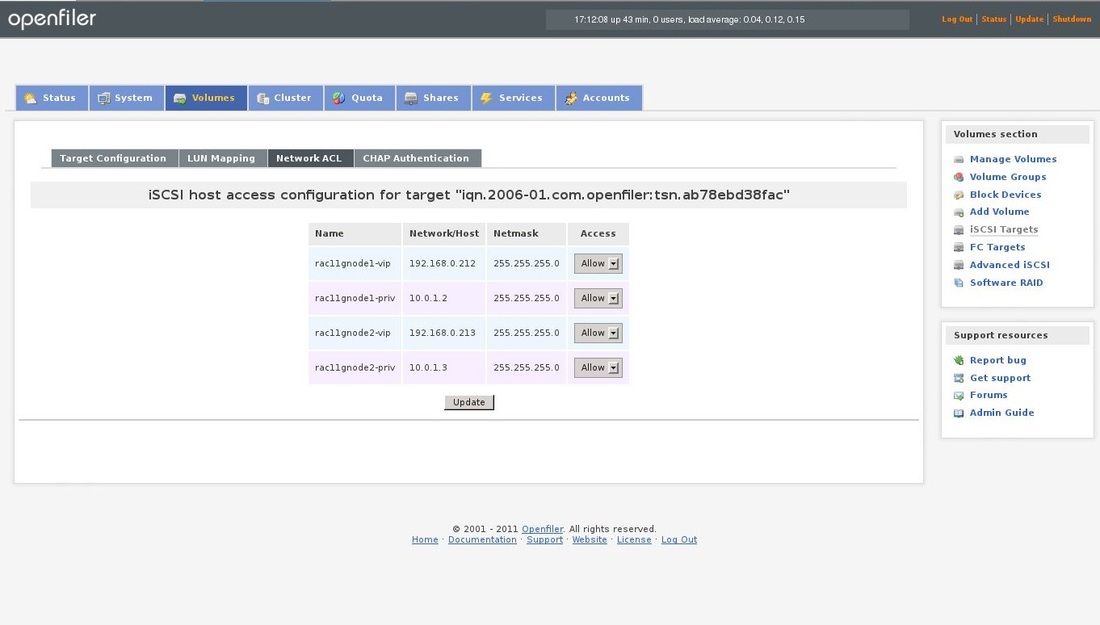
Click on Network ACL on the same page and allow access for all items by choosing Allow and click on the update button:
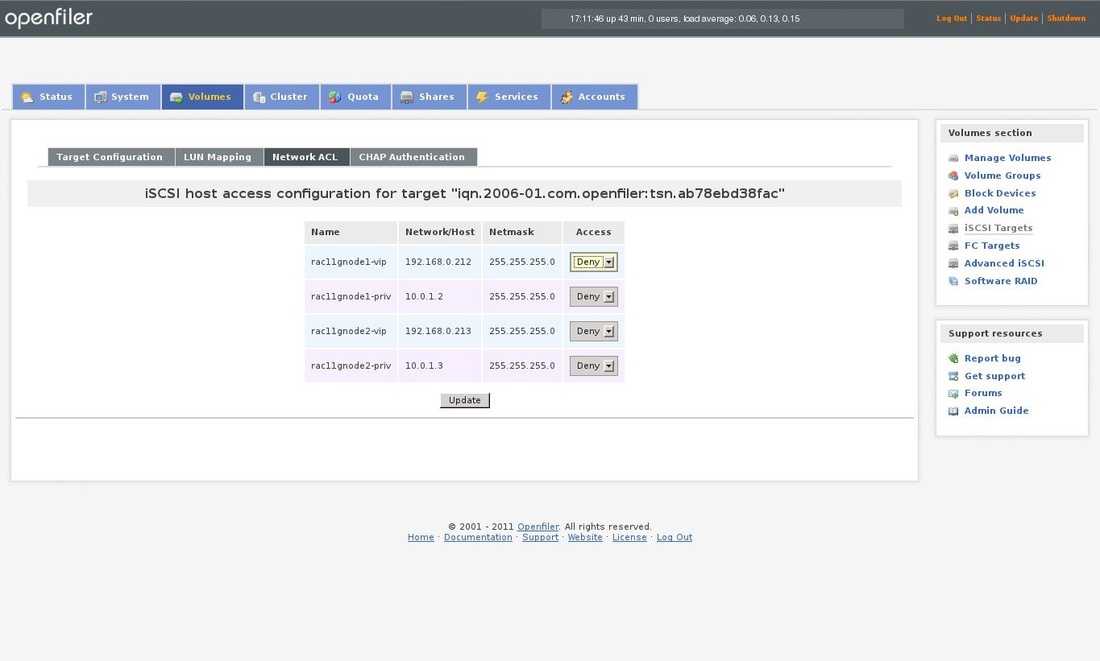
Access is allowed and the configuration is finished on the openfiler side.
\Now configure the iscsi on the RAC servers:
Discover the iSCSI target from the client:
[root@rac11gnode1 ~]# iscsiadm -m discovery -t st -p 10.0.1.122
10.0.1.122:3260,1 iqn.2006-01.com.openfiler:tsn.ab78ebd38fac
192.168.0.122:3260,1 iqn.2006-01.com.openfiler:tsn.ab78ebd38fac
Automaticaly logon after boot:
[root@rac11gnode1 ~]# iscsiadm -m node -T iqn.2006-01.com.openfiler:tsn.ab78ebd38fac -p 10.0.1.122 --op update -n node.startup -v automatic
If the above commands will fail with error message that no portal exists, please comment the line in the /etc/initiators.deny on openfiler server.
As you can see above, there are 2 portals configured because I have 2 network adapters configured. Because of this I saw the all disks twice on both RAC nodes. To solve this issue, the multipath has to be installed and configured.
Install the package on bot nodes:
yum install device-mapper-multipath
Copy the default configuration file:
cp /usr/share/doc/device-mapper-multipath-0.4.9/multipath.conf /etc
Start the service and make the service start automatically after reboot:
service multipathd start
chkconfig multipathd on
You can check if it's working fine with following command:
multipath -l
You should be able to see the disks in the /dev/mapper directory:
[root@rac11gnode1 mapper]# ll
total 0
crw-rw----. 1 root root 10, 236 Apr 7 08:37 control
lrwxrwxrwx. 1 root root 7 Apr 7 08:37 mpatha -> ../dm-2
lrwxrwxrwx. 1 root root 7 Apr 7 08:37 mpathb -> ../dm-3
lrwxrwxrwx. 1 root root 7 Apr 7 08:37 mpathc -> ../dm-4
lrwxrwxrwx. 1 root root 7 Apr 7 08:37 mpathd -> ../dm-5
lrwxrwxrwx. 1 root root 7 Apr 7 08:37 mpathe -> ../dm-6
lrwxrwxrwx. 1 root root 7 Apr 7 08:37 mpathf -> ../dm-7
lrwxrwxrwx. 1 root root 7 Apr 7 08:37 mpathg -> ../dm-8
lrwxrwxrwx. 1 root root 7 Apr 7 08:37 mpathh -> ../dm-9
lrwxrwxrwx. 1 root root 8 Apr 7 08:37 mpathi -> ../dm-10
lrwxrwxrwx. 1 root root 8 Apr 7 08:37 mpathj -> ../dm-11
lrwxrwxrwx. 1 root root 7 Apr 7 08:37 vg_rac11gnode1-LogVol00 -> ../dm-1
lrwxrwxrwx. 1 root root 7 Apr 7 08:37 vg_rac11gnode1-LogVol01 -> ../dm-0
check with the fdisk:
[root@rac11gnode1 mapper]# fdisk -l /dev/mapper/mpatha
Disk /dev/mapper/mpatha: 1073 MB, 1073741824 bytes
255 heads, 63 sectors/track, 130 cylinders
Units = cylinders of 16065 * 512 = 8225280 bytes
Sector size (logical/physical): 512 bytes / 512 bytes
I/O size (minimum/optimal): 512 bytes / 512 bytes
Disk identifier: 0x00000000
Now, we should create partitions on those disks using the fdisk:
[root@rac11gnode1 mapper]# fdisk /dev/mapper/mpatha
Choose "n" for new partition, "p" for primary and than 1. Choose "w" for write changes to disk and the partition will be created.
Repeat this for all disks.
Now we can install the oracleasm package. Repeat this on both nodes.
[root@rac11gnode1 ~]# yum install oracleasm*
Configure ASM on both nodes:
[root@rac11gnode1 ~]# /etc/init.d/oracleasm configure
Configuring the Oracle ASM library driver.
This will configure the on-boot properties of the Oracle ASM library
driver. The following questions will determine whether the driver is
loaded on boot and what permissions it will have. The current values
will be shown in brackets ('[]'). Hitting <ENTER> without typing an
answer will keep that current value. Ctrl-C will abort.
Default user to own the driver interface [oracle]: grid
Default group to own the driver interface [dba]: asmadmin
Start Oracle ASM library driver on boot (y/n) [y]:
Scan for Oracle ASM disks on boot (y/n) [y]:
Writing Oracle ASM library driver configuration: done
Initializing the Oracle ASMLib driver: [ OK ]
Scanning the system for Oracle ASMLib disks: [ OK ]
Create ASM disks on first node. If you will see that the operation has failed, you can check in the oracleasm logfile located in /var/log directory. I saw that there was permission denied while trying to write to the disk. After few minutes I have found out, that it was caused by fact that I have forgot to disable the selinux in the /etc/sysconfig/selinux file. I have changed it to disabled and rebooted the node. After this I was able to create the ASM disks:
[root@rac11gnode1 ~]# /etc/init.d/oracleasm createdisk ACFS1 /dev/mapper/mpatha
Marking disk "ACFS1" as an ASM disk: [ OK ]
[root@rac11gnode1 ~]# /etc/init.d/oracleasm createdisk ACFS2 /dev/mapper/mpathb
Marking disk "ACFS2" as an ASM disk: [ OK ]
[root@rac11gnode1 ~]# /etc/init.d/oracleasm createdisk ASM1 /dev/mapper/mpathc
Marking disk "ASM1" as an ASM disk: [ OK ]
[root@rac11gnode1 ~]# /etc/init.d/oracleasm createdisk ASM2 /dev/mapper/mpathd
Marking disk "ASM2" as an ASM disk: [ OK ]
[root@rac11gnode1 ~]# /etc/init.d/oracleasm createdisk ASM3 /dev/mapper/mpathe
Marking disk "ASM3" as an ASM disk: [ OK ]
[root@rac11gnode1 ~]# /etc/init.d/oracleasm createdisk ASM4 /dev/mapper/mpathf
Marking disk "ASM4" as an ASM disk: [ OK ]
[root@rac11gnode1 ~]# /etc/init.d/oracleasm createdisk ASM5 /dev/mapper/mpathg
Marking disk "ASM5" as an ASM disk: [ OK ]
[root@rac11gnode1 ~]# /etc/init.d/oracleasm createdisk ASM6 /dev/mapper/mpathh
Marking disk "ASM6" as an ASM disk: [ OK ]
[root@rac11gnode1 ~]# /etc/init.d/oracleasm createdisk ASM7 /dev/mapper/mpathi
Marking disk "ASM7" as an ASM disk: [ OK ]
[root@rac11gnode1 ~]# /etc/init.d/oracleasm createdisk ASM8 /dev/mapper/mpathj
Marking disk "ASM8" as an ASM disk: [ OK ]
If this will not work (device or resource bussy in the oracleas log) you can use:
/usr/sbin/asmtool -C -l /dev/oracleasm -n DISK1 -s /dev/sdb1 -a force=yes
Check oracleasm and disks on both nodes:
[root@rac11gnode1 ~]# /etc/init.d/oracleasm status
Checking if ASM is loaded: yes
Checking if /dev/oracleasm is mounted: yes
[root@rac11gnode1 ~]# /etc/init.d/oracleasm listdisks
ACFS1
ACFS2
ASM1
ASM2
ASM3
ASM4
ASM5
ASM6
ASM7
ASM8
I will check the same on the second node:
[root@rac11gnode2 ~]# /etc/init.d/oracleasm restart
Dropping Oracle ASMLib disks: [ OK ]
Shutting down the Oracle ASMLib driver: [ OK ]
Initializing the Oracle ASMLib driver: [ OK ]
Scanning the system for Oracle ASMLib disks: [ OK ]
[root@rac11gnode2 ~]# /etc/init.d/oracleasm listdisks
ACFS1
ACFS2
ASM1
ASM2
ASM3
ASM4
ASM5
ASM6
ASM7
ASM8
Our SAN storage is configured and prepared, so we can proceed with the installation of the grid and oracle DB.
